Windows Mobile คู่มือการติดตั้ง
Still using ancient Microsoft technology? That's ok, here is what you do.
ขั้นตอน 1
Get credentials to use to authenticate (requires a Pro account).
ขั้นตอน 2
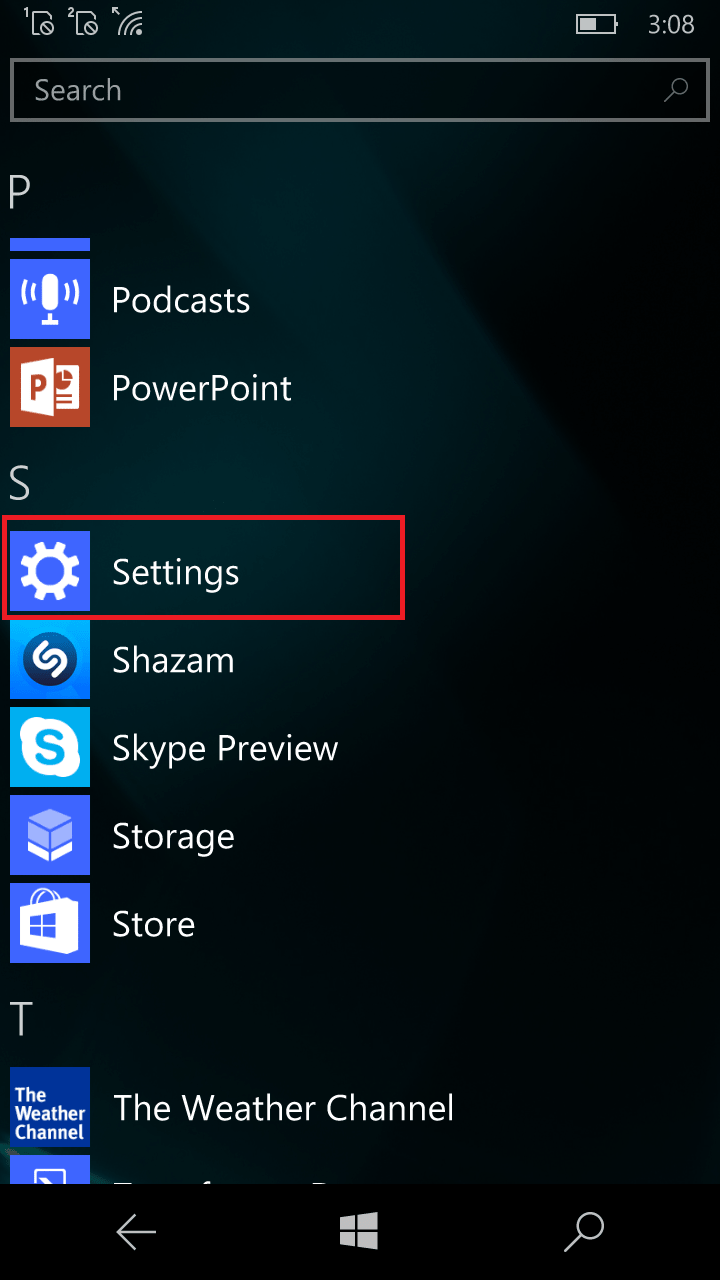
Open the "Settings" on the phone
ขั้นตอน 3
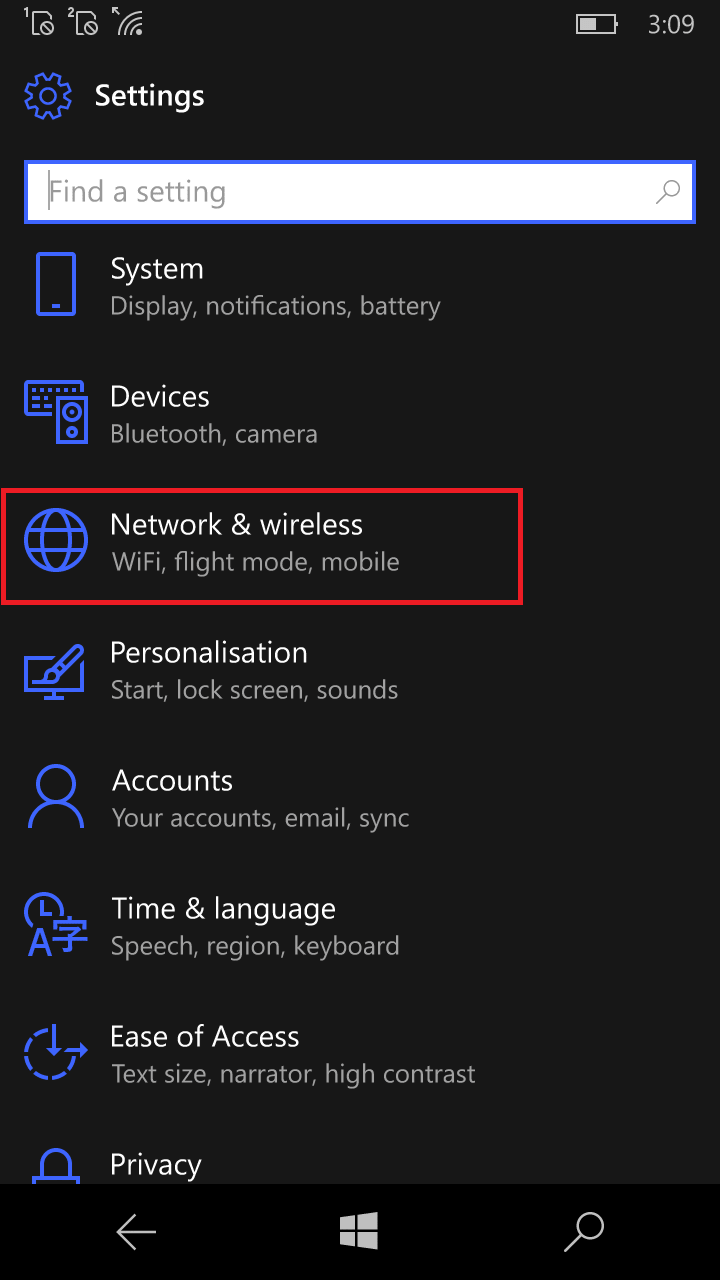
Click on "Network & Wireless"
ขั้นตอน 4
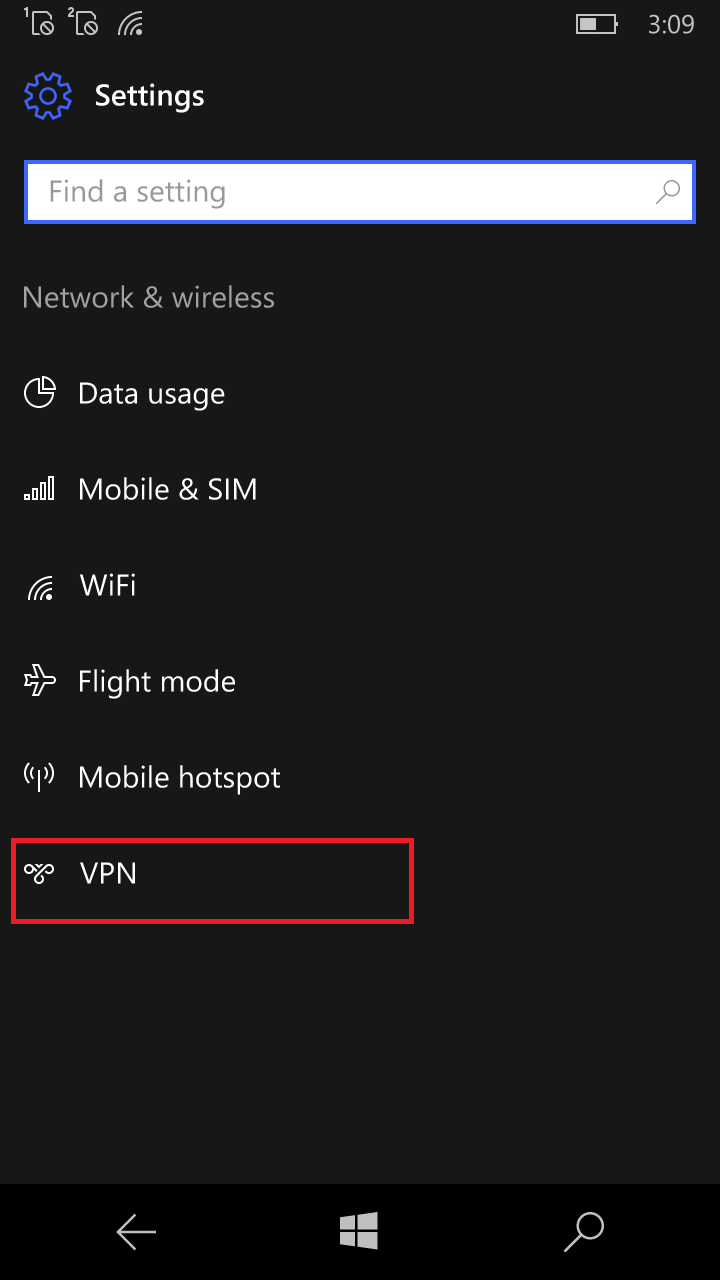
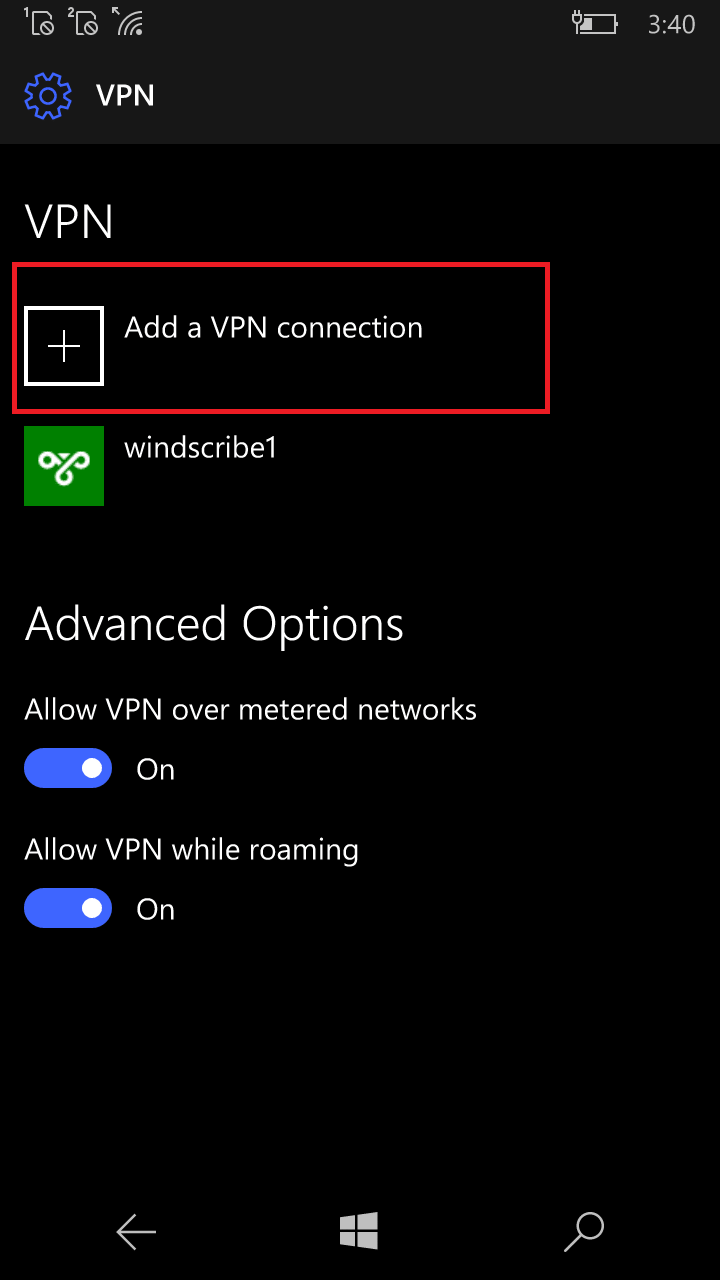
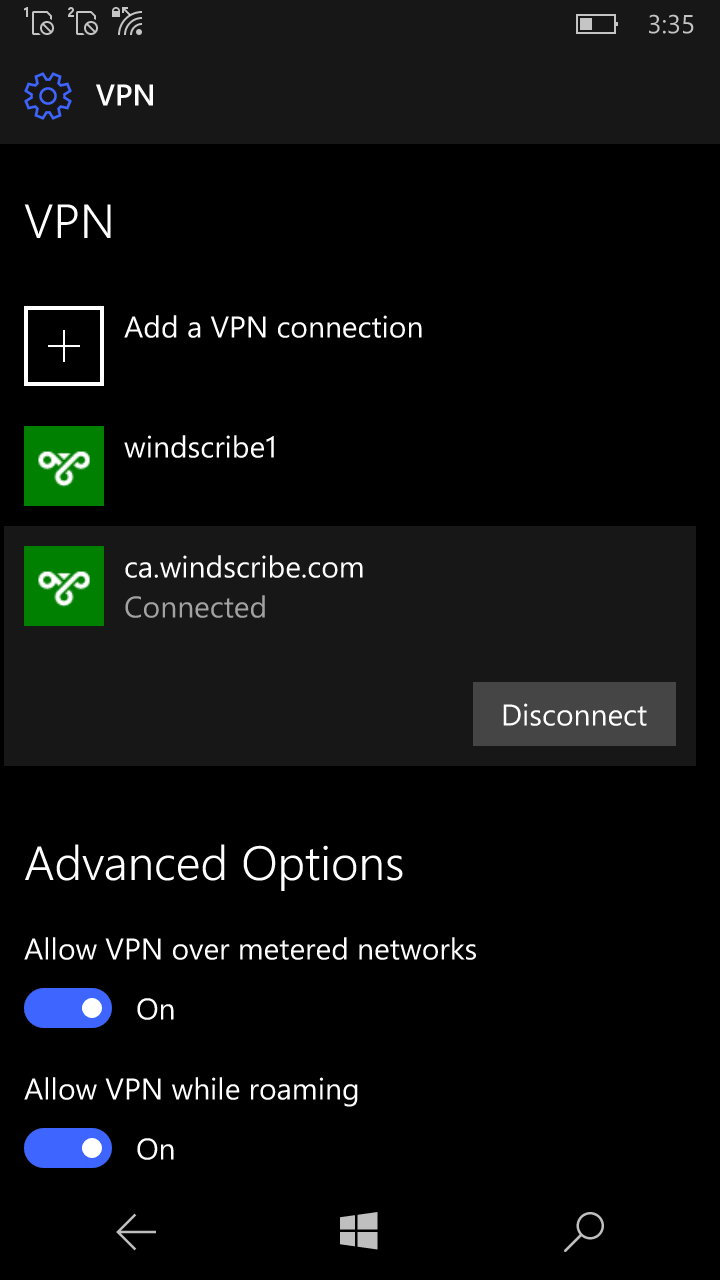
Click on "VPN"
ขั้นตอน 5
Click on "Add VPN Connection".
It is very important that you create a new VPN connection profile instead of editing an existing one, as it will not work due to a bug in Windows Mobile.
ขั้นตอน 6
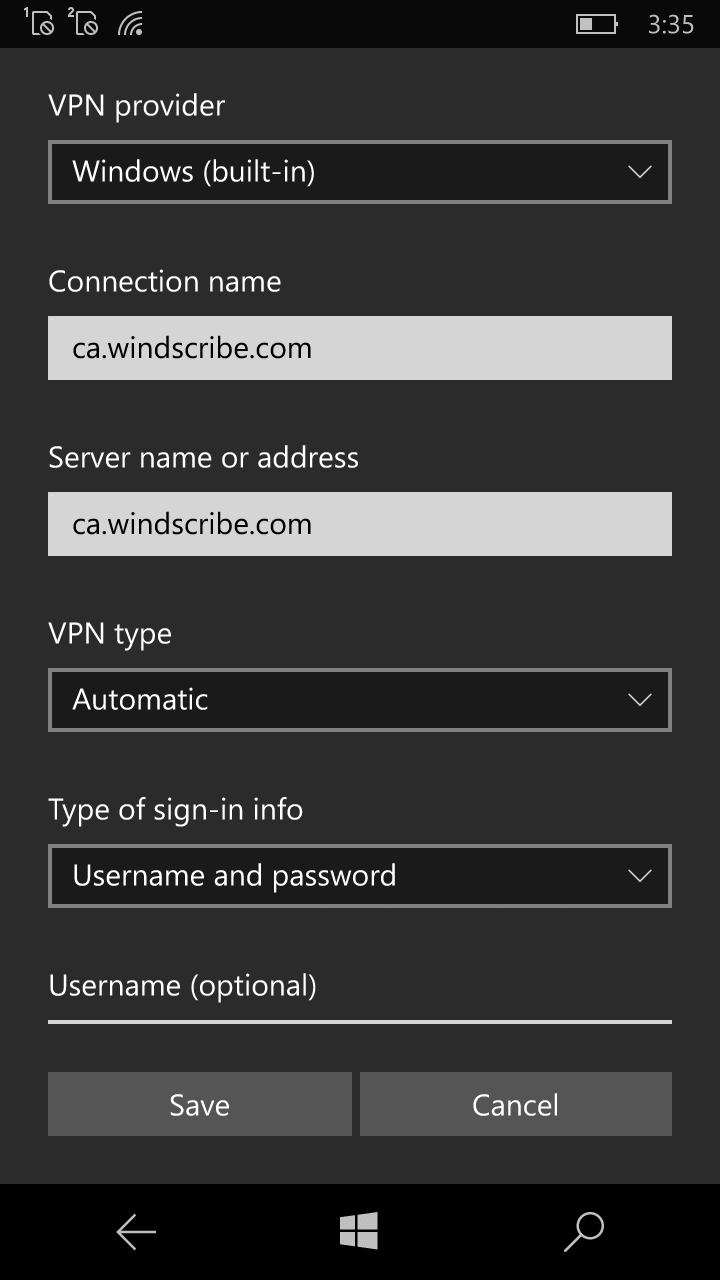
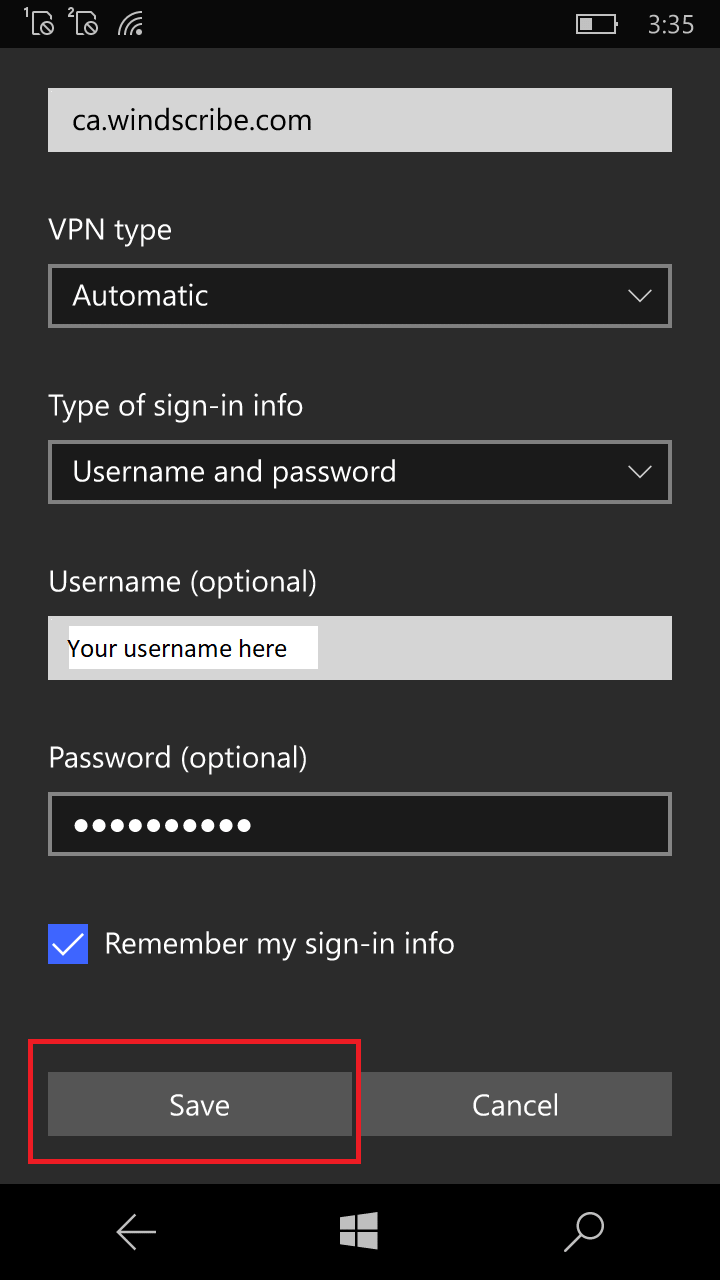
Select "Windows (built-in)" as VPN provider, enter connection name (any name you wish), select VPN type "Automatic".
Make sure you choose Automatic and not IKev2 as it won't work due to a bug in Windows Mobile.
Then input the Server address, username and password as provided on the Profile Generator page in Step 1.
ชื่อผู้ใช้และรหัสผ่านนี้จะต่างกับการล็อคอินเข้า Windscribe
ขั้นตอน 7
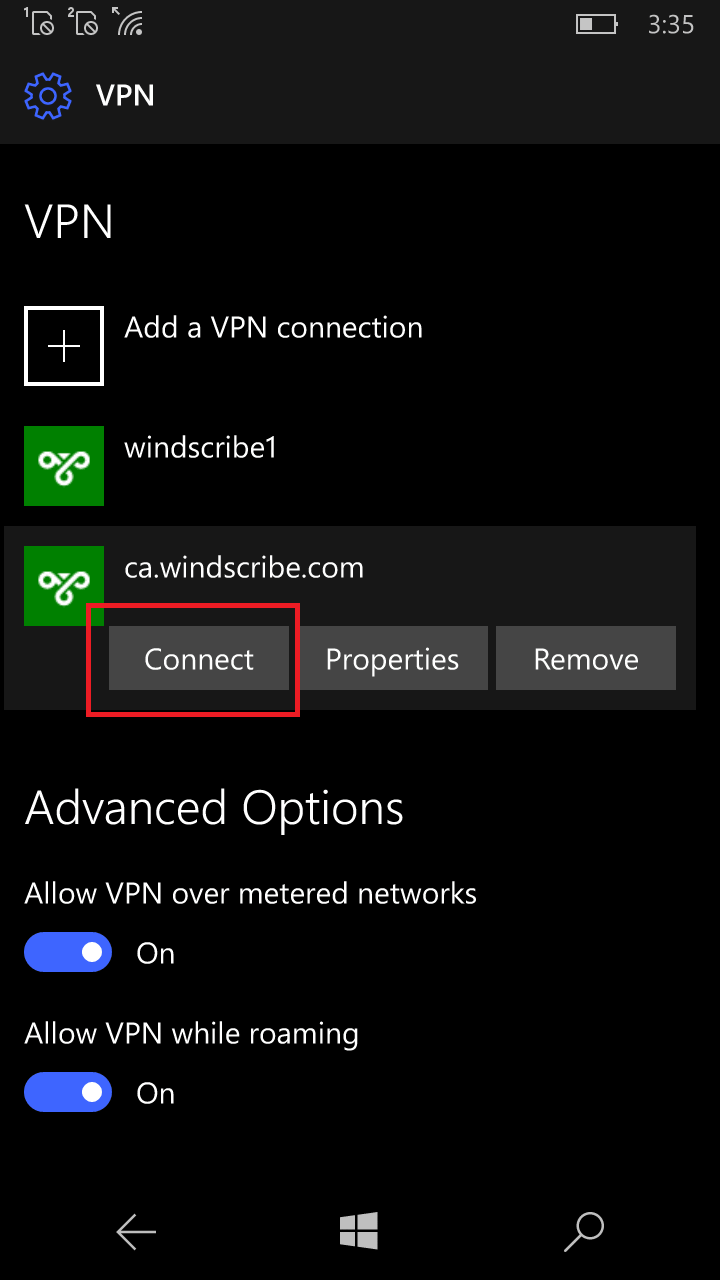
Click on the profile you just created, and click on the "Connect" button to connect.
ส่วนต่อท้าย
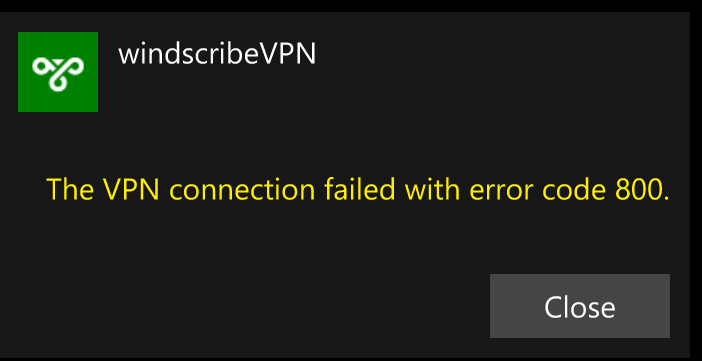
If you receive error message "The VPN connection failed with error code 800", please double check your username and password you entered as they may not be correct